


Produsent: RADIOLINK
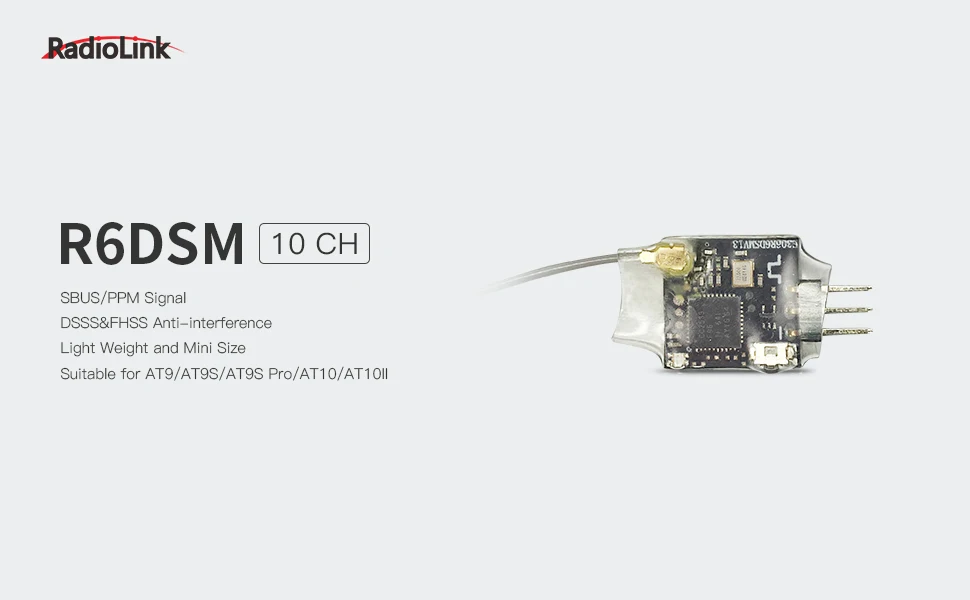
Radiolink R6DSM 2.4G 10CH Mini Receiver SBUS/PWM
Specification:
Control distance: about 600 meters, actually control distance depends on the environment.
Compatible transmitters: AT10II, AT10, AT9S Pro, AT9S and AT9


SKU: RLR6DSM
 Fri frakt*:
- Produktinformasjon
- Brukermanual
Produktinformasjon
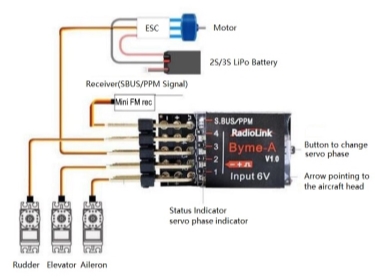
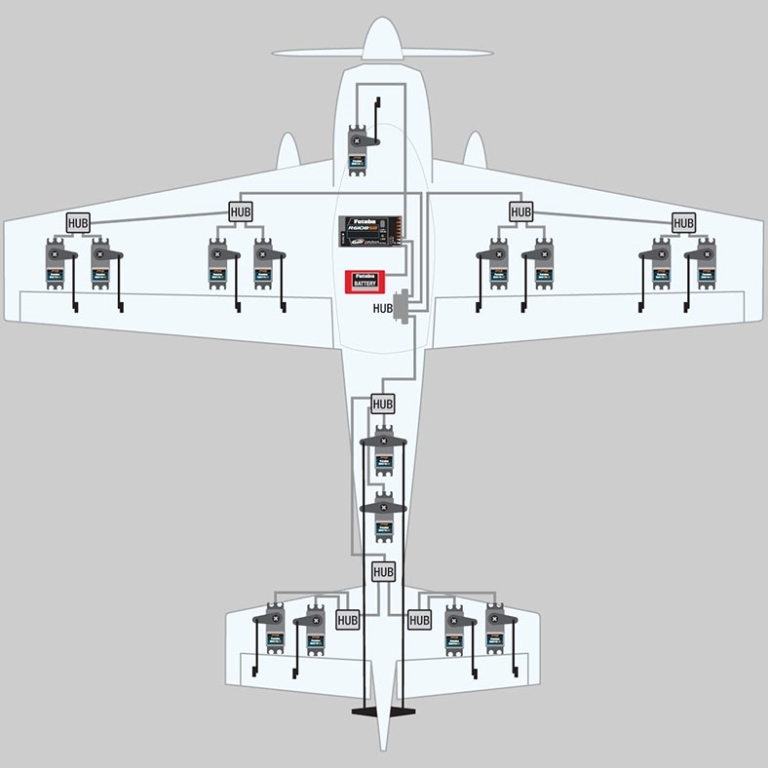
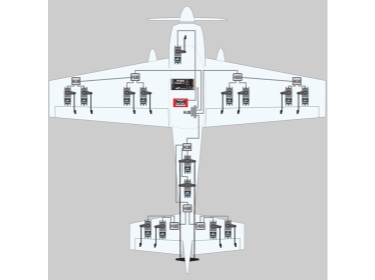
R6DSM er en 10 kanals S-BUS/PPM mottaker som er beregnet å bruke sammen med Byme Gyro, Mini Pix flight controller eller andre typer servo decoder (HUB). Man oppnår på den måten et utall av muligheter, lang rekkevidde og høy stabilitet. Se illustrasjon.
DSSS&FHSS algorithm reduce overall signal interference for Radiolink R6DSM 2.4G rc receiver. Support PPM/SBUS signal output, high voltage servo(4.8-6v), works with Radiolink AT9/AT9S/AT9S Pro/AT10/AT10II.
Key Features:
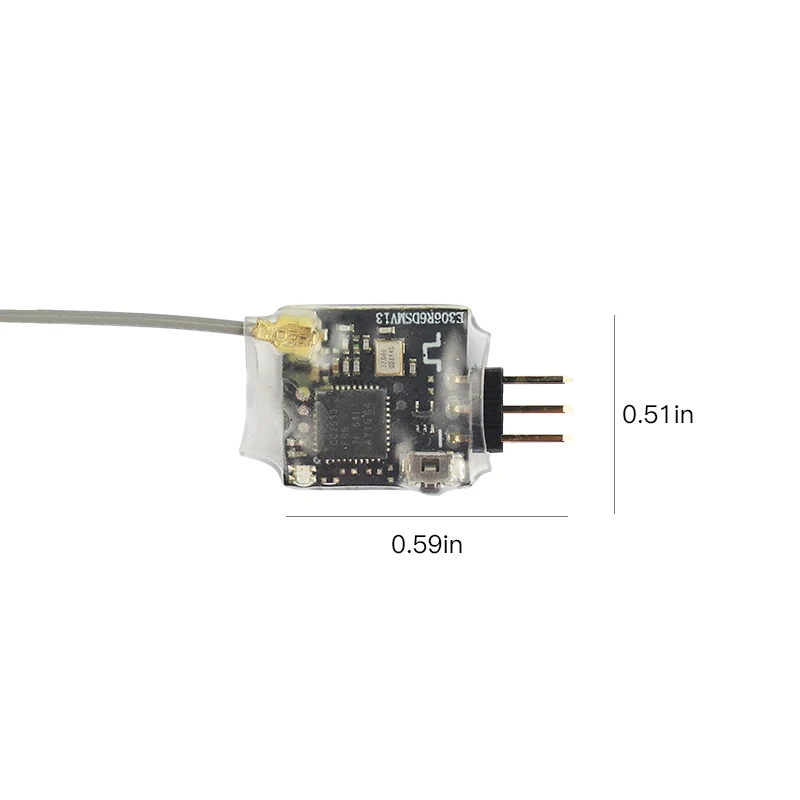
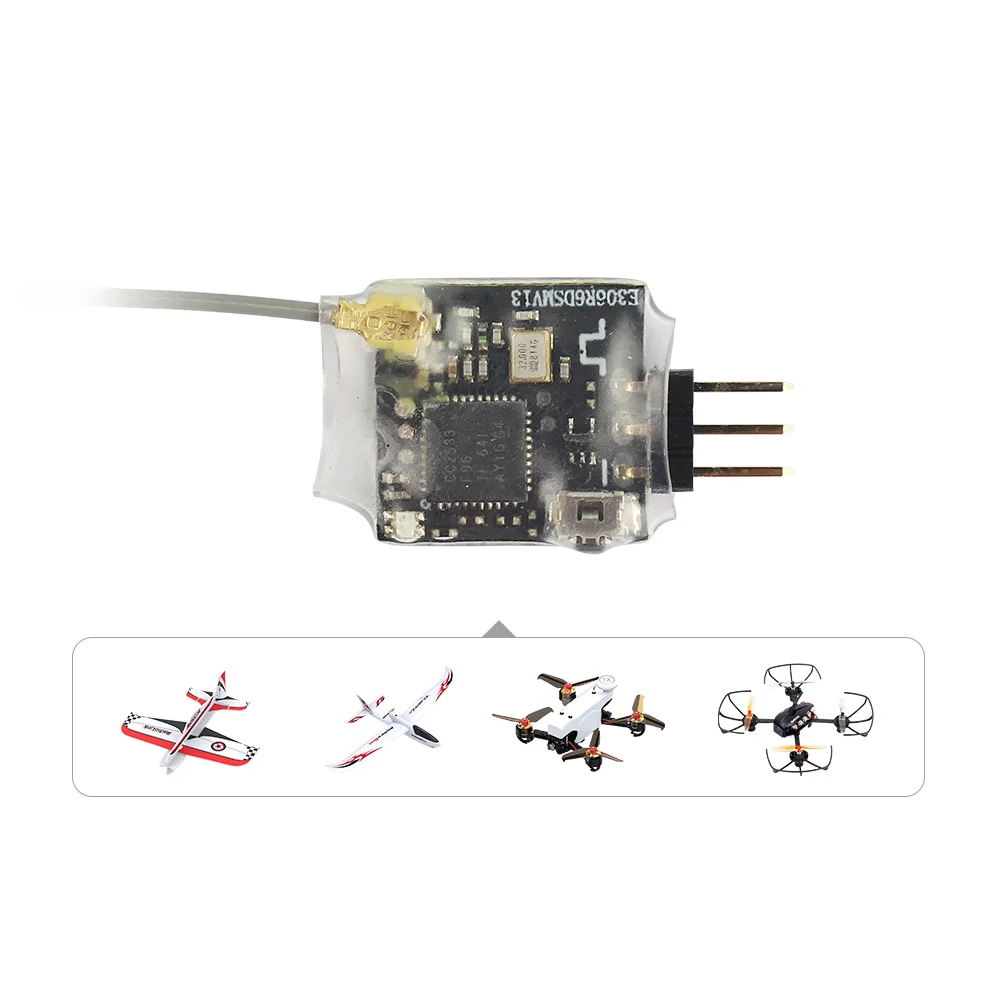
1)Ultra light weight about 1 gram, esp for mini FPV racing quadcopter Drone
2)Support SBUS/PPM signal out put.
3)DSSS and FHSS spread spectrum woks synchronously, it provides excellent anti-interference performance, highly constant, and stable transmission.
4)Control Distance, The receiving distance can reach about 600 meters, and the actual control distance is related to the flight environment.
5)Works with Radiolink Models: AT9/ AT9S/ AT9S Pro/AT10/ AT10II transmitter
Note:
R6DSM rc receiver suitable for Radiolink’s transmitter AT9/AT9S/AT9S Pro/AT10/AT10II
R6DSM Specification:
8) Control distance: about 600 meters, actually control distance depends on the environment.
How to bind to transmitter:
1. Place the transmitter and the receiver close to each other about 50cm.
2. Turn on the transmitter, then power on the R6DSM.
3. There is a black button on the R6DSM, press the binding button in one second until the receiver light starts blinking and release, after about 8 times blinking, match code success when receiver signal LED always on.
Working Mode:
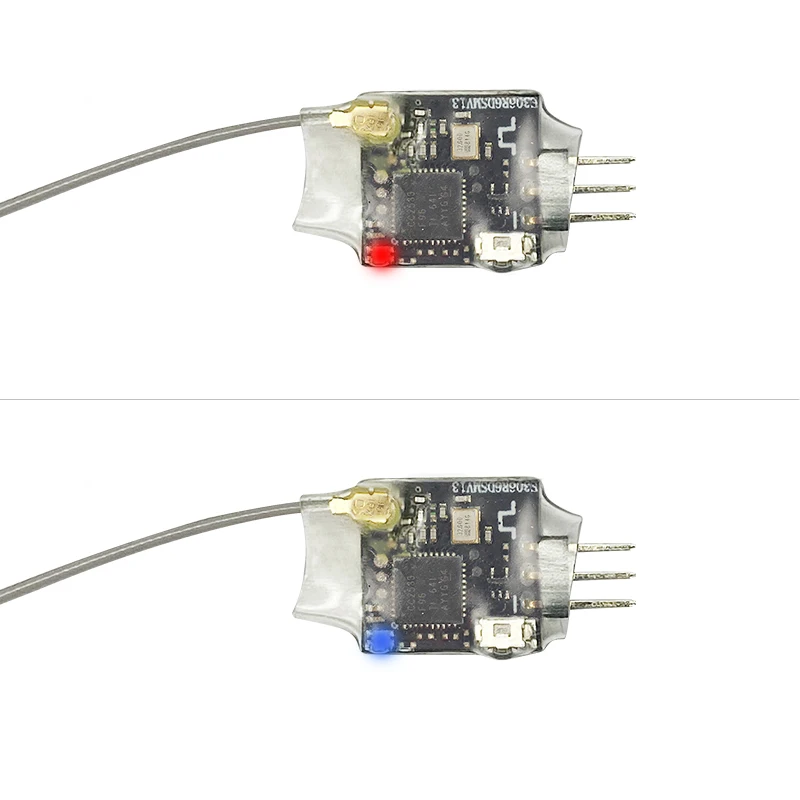
Blue/purple LED, SBUS signal , 10 channels totally.
Red LED always, PPM signal, 10 channels totally.
Package Included:
R6DSM Receiver x 1
Easy to Bind and Change Signal
Only 1 second to bind with your radio, press twice bind button within 1 second to change signal mode. Blue LED -SBUS; Red LED-PPM
Modify System Menu
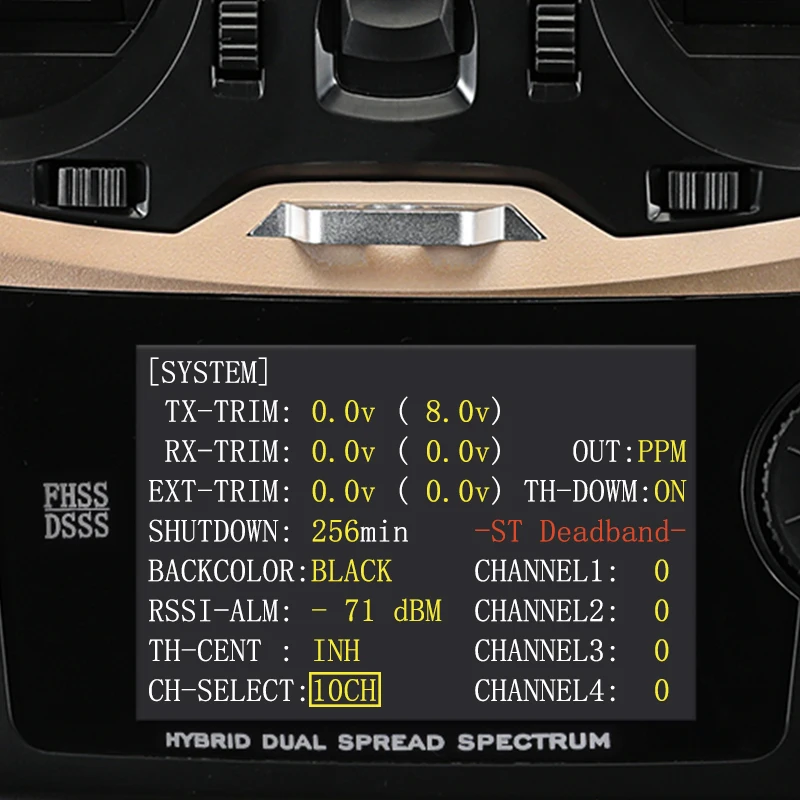
R6DSM+AT10II: SYSTEM Menu, Select CH-SELECT to 10CH mode.
R6DSM+AT9S: SYSTEM Menu, Select CH-SELECT to 10CH mode.
Q:Why the LED of R6DSM is off after it’s powered on?
A:1. Check if the battery is charged.
2.Check if the polarity is correctly connected.
3.Check if the connection between the receivers and the power supply is good.
If there’s no problem with the above three points, the receiver may get burnt and needs to be repaired.
Q:Why the vehicle can’t be controlled after the binding between R6DSM and transmitter is done?
A:First, check if the power supply of the receiver and the transmitter is ok. Then modify the channel quantity of the transmitter (AT9/AT9S/AT10/AT10II) as 10 to work with R6DSM, the 10-channel receiver. Press Mode button to enter BASIC MENU => Rotate the dial to select SYSTEM and Enter => Set CH-SELECT as 10CH.
Q:When R6DSM works with AT9S, why the control range is more limited than 600 meters (in air) as advertised?
A:1.Check if the antenna of transmitter and receiver is damaged or welded joint
2.Check if there’s interference resources like electricity substation or high voltage cable or WIFI nearby.
3.Check the RSSI value.
A: Power on the transmitter and receiver with both antennas parallel and straight and within the distance of 30cm.
b: Then check the RSSI value. Range between 0~-30dBM is normal and if the value gets closer to 0, the signal is stronger.
Brukermanual

TR 2.4GHz 4CH vanntett mottaker

Radiolink 2.4GHz R8FM 8CH mini mottaker

Radiolink R12DSM 2.4G 12 Channels Mini mottaker

Radiolink R8FG 2,4 Ghz 8 Ch mottaker Gyro Telemetri SBUS/PWM/PPM

Radiolink R6F V2 2,4 GHz FHSS mottaker

RadioLink R6FG V3 2.4G 6CH FHSS Gyro Mottaker

Flysky FS-IA10B 10 kanal mottaker

HT-6A 6 ch FHSS mottaker

HT-6A Flight Control Gyro Receiver

HT S-bus mottaker

HT-F-06A 6 ch FHSS mottaker med telemetri

HT-F-08A 8 ch FHSS mottaker med telemetri
TR 2.4GHz 4CH vanntett mottaker
Radiolink 2.4GHz R8FM 8CH mini mottaker
Radiolink R12DSM 2.4G 12 Channels Mini mottaker
Radiolink R8FG 2,4 Ghz 8 Ch mottaker Gyro Telemetri SBUS/PWM/PPM
Radiolink R6F V2 2,4 GHz FHSS mottaker
RadioLink R6FG V3 2.4G 6CH FHSS Gyro Mottaker
Flysky FS-IA10B 10 kanal mottaker
HT-6A 6 ch FHSS mottaker
HT-6A Flight Control Gyro Receiver
HT S-bus mottaker
HT-F-06A 6 ch FHSS mottaker med telemetri
